 I love 3D paper things. Love. And when I saw a little picture of what appeared to be paper balls in a CB2 catalog, I thought, "I am going to make those."
 So the other day while Alex was writing a paper about mysterious things like polymers and flexible films and tactoids, I made a paper ball. Then I proudly announced I had created a tactoid and it was sitting on my desk. He giggled. Apparently a tactoid is not a paper ball.
  These are made from 12 slotted flower shapes that fit together to form a sphere. No adhesive needed; the only ingredient is paper. I made a template in Illustrator and cut out the shapes with my Silhouette machine (directly from Illustrator using a plug-in), but you could also print out the pages and cut by hand, too.
 Download the PDF templates here:
Large ball (10")– print/cut 12 sheets
Medium ball (5")– print/cut 2 sheets
Small ball (3")– print/cut 1 sheet
Download a Silhouette .studio file here:
Small ball (3")– unzip the file; cut 1 sheet. (The shapes can be scaled up or down in Silhouette Studio if you'd like to change the size.)
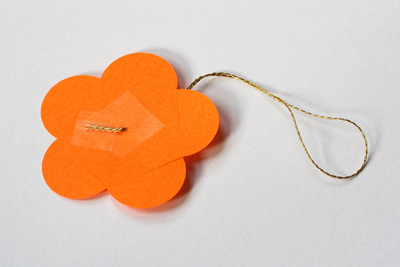
 If you want to hang your ornament, you might like to add the string before assembling the ball. I placed a piece of tape on the back of one flower so the hole wouldn't tear, then used a needle to pull string through, forming a loop on the front side. I secured the ends of the string on the back side with another piece of tape.
  Use the slits to join petals together. Keep adding shapes, connecting as you go, so that every petal is connected to another petal on a neighboring flower.
  It might be helpful to think of the first piece as the "north pole," and then add a row of five flowers encircling it. At this point, the ball is half finished. Here's what it looks like upside-down:
 Attach the next row of five flower shapes, and finally, add the "south pole" piece to finish the globe.
 The colored balls are made from regular-weight computer paper (Astrobright from Office Max) and the white balls are made with cardstock. The big sphere is the size of a basketball; the little one is approximately a baseball. And the medium-sized guy is maybe a large grapefruit.
You have read this article christmas /
paper /
tutorials
with the title How to make 3D paper ball ornaments. You can bookmark this page URL http://jenkrebs.blogspot.com/2011/11/how-to-make-3d-paper-ball-ornaments.html. Thanks!


Awesome!!:D lOVE IT
ReplyDeletethank you And the medium-sized guy is maybe a large grapefruit
ReplyDeleteRokettube
Teen Porno
brazzers
Lezbiyen Porno
Brazzers
Obat Kanker Serviks Herbal
ReplyDeleteProcrastinator work hard to succeed. People who are lazy likely to be deprived of his life.