 Inkodye testing continues in the Jones lab, this time on wood. I bought an unfinished frame at Michaels for one whole dollar and doctored it up with the dye. This is the result.
 Who are those youngsters in the frame? Beats me. Is anyone friends with them? I needed a temporary photo to stick inside so I could take a picture of the finished product. I searched online for "couple with umbrella," found this product photo, and printed it out.
At one time Alex and I owned a double umbrella. It was an impulse purchase when we were caught in a rainstorm. I think we used it twice. I wonder whatever happened to it.
 But back to the project. I brushed Inkodye onto the frame with a foam brush. It doesn't take much for wood, so this won't use up much of your precious elixir.
  I cut raindrops out of black paper, arranged them on the frame, and carried the ensemble out to our back stairs. After 5 minutes, the color seemed bright, so I brought it in. The photo above is probably around the 2-minute mark.
 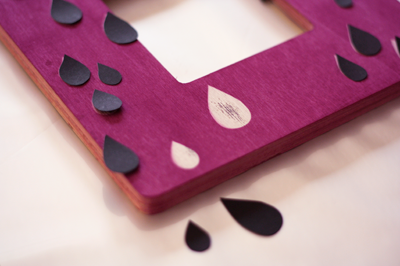 Since the frame was damp from the dye, you'll notice the paper curled just a bit, and some of the black ink from the paper was transferred to the frame. I managed to scrub it off pretty thoroughly, fortunately. Maybe next time I would cut up some vinyl, or contact paper with the backing left on, or something opaque and unaffected by moisture.
 I quickly washed the frame with soap, water and a sponge, rinsing and scrubbing to get all the excess dye off, particularly from the raindrop areas. Do this promptly so the dye won't continue to develop in the raindrops! The result looks pretty good.
Other Inkodye projects are here and here.
You have read this article inkodye /
tutorials
with the title Picture frame project with Inkodye. You can bookmark this page URL http://jenkrebs.blogspot.com/2011/08/picture-frame-project-with-inkodye.html. Thanks!


No comment for "Picture frame project with Inkodye"
Post a Comment