Showing posts with label pattern review. Show all posts

Triple-zip pouches you can sew

My mom (known as Grandma G in the comments around here) sent over photos of pouches she made using the Triple-Zip Pouch tutorial from A Quilter's Table. Has anyone else tried it out? Looks like fun! I asked Mum if she had any comments or notes on the tutorial.

She said:
"I don't have a lot to say about this tutorial. Simply put, these pouches were FUN to make! I loved how each layer was added on, step by step, and suddenly you turn it right side out, and it becomes the pouch! With THREE (easily installed) zippers! I think the design was brilliant, and the tutorial was clear-cut and easy to follow. You have to pay close attention to the details and follow them exactly, but once you get the hang of it, it goes together quickly!

I eliminated the fusible fleece, since the fabric was home dec weight, and it worked out just fine, except that it made the upper corners a bit more bulky and harder to turn out, but IMO that's no big deal.

I also love that the tutorial is available in a PDF file, so I could download it to my iPad and work from there!

Thanks, Debbie, for a great tutorial! I'm off to make another pouch!"

Mum used a lot of exclamation points there, so that means she liked it. I'm embarrassed to say I had to think long and hard what "IMO" might mean. She's cool. IMO.
You have read this article pattern review / sewing with the title pattern review. You can bookmark this page URL http://jenkrebs.blogspot.com/2012/09/triple-zip-pouches-you-can-sew.html. Thanks!

Satchel sewing pattern review

My mom, known to you guys as Grandma G, has made another bag! This is the "Too Cool for School Satchel" pattern from the book A Bag for All Reasons by Lisa Lam. The fabric is my Skiff print in Dawn. How fun is this? I'm always a sucker for hardware on handmade bags since it makes them look smart and professional.

Along with photos, Mum has provided a review of this pattern in case anyone else wants to give it a try. About this "Too Cool for School Satchel," she says:

This is a very cool bag, and it isn't as hard to make as it might look. Yes, there's a lot of fiddly work to it, with all the flap and strap tabs. They take some extra time and careful sewing to get the shape consistent, but they're not really difficult.

The hardest part was sewing around the curves, especially attaching the front pocket to its gusset, since there were a number of layers, and the curves were smaller than those on the main bag body. But again, it's just a matter of taking your time and sewing carefully to get a nice curve. I used binder clips to hold the thick layers of fabric together, which you can see in the photo, and that worked really well.

I'd recommend this pattern! The instructions are very clear and easy to follow, and everything you need to know is included in the book. The hardware adds so much for making the bag look great. One thing I would note when buying the buckles is that Lisa's buckles have a little bar across the male end for threading the tab through with no sewing needed. The ones I used did not, so I had to stitch the tab down, though it's not a big deal... just something to be aware of. If I'd had enough rivets on hand, I would've used them instead of stitching. I did add rivets to the strap tab (which you can't see in the photo), as Lisa did on her bag.

I would change one thing if I were to make the bag again. When carrying the bag, it tends to pivot at the points where the strap is attached, so it leans forward or backward. I think I would attach the tabs closer to the top of the gusset, even though all the satchels of any kind I've seen in photos online have the tabs lower like that. Maybe there's something else that would keep the bag from leaning one way or the other? Any ideas?

You have read this article pattern review / sewing with the title pattern review. You can bookmark this page URL http://jenkrebs.blogspot.com/2012/07/satchel-sewing-pattern-review.html. Thanks!

An orange skirt from Mum

I have the best Mom. (Known to you all as Grandma G, faithful commenter on my blog posts.) I said, "Mumsy, would you pretty please sew me a pleated orange skirt?" And so she did. I picked McCall's M5591 as the pattern and my Boardwalk print as the fabric since I had some extra yardage. It's home dec weight, so it was an experiment to see what sort of skirt would result. A cute one, it turns out! It's a little bit heavy for summer, I suppose, but I don't care about things like that.

I recruited my husband to take a couple pictures. I'm not a good poser, and thus I have only one arm and one leg in the photo above. But you get the idea.

Look, it has pockets!

And Mum sewed a sweet surprise inside— the selvedge from this print.

For anyone interested making this pattern, here are her comments on McCall's M5591:

The first thing I would say about this pattern is that I don't know how a person is supposed to know what size to buy! I thought most garment patterns have body measurements on the outside of the envelope, but this one had none. Fortunately, the envelope contained four sizes, so Jess was pretty sure one of them would fit her when she bought it. One did, but not the one she thought. Not even close. ;) So the first thing to note is that if you buy this pattern, don't go according to your regular clothing size! Once you get to the pattern pieces inside, they give measurements as to the waist measurement, etc., for each pattern size. I don't know if the large McCall's pattern catalog in the stores has a size chart or not. I would certainly hope so!

The instructions are pretty straight-forward and easy to follow. I'd say it would be helpful to have some sewing experience before making this skirt, because it doesn't include some little things like finishing seams or which way to press them, etc. The only thing I found to be a little challenging was the zipper. Don't let this be your first-ever zipper installation! It was challenging because of the pleat in the center back where the zipper goes. Mine ended up not quite as neat as I'd have liked it, but I didn't redo it because I thought it might not turn out any better the second time... and because I didn't feel like ripping it out and doing it again.

One last quick tip, if you decide to make this skirt: If you use the version where the pockets are in the side seam, make sure that they are turned toward the front of the skirt when you sew on the yoke. It will save you over an hour's worth of seam ripping and resewing. Ahem. ;)
You have read this article pattern review / sewing with the title pattern review. You can bookmark this page URL http://jenkrebs.blogspot.com/2012/06/an-orange-skirt-from-mum.html. Thanks!

Pattern review: Bucket Bag

My mom, known to you guys as frequent commenter Grandma G, just finished sewing up a Bucket Bag from Keyka Lou's PDF pattern. She used 
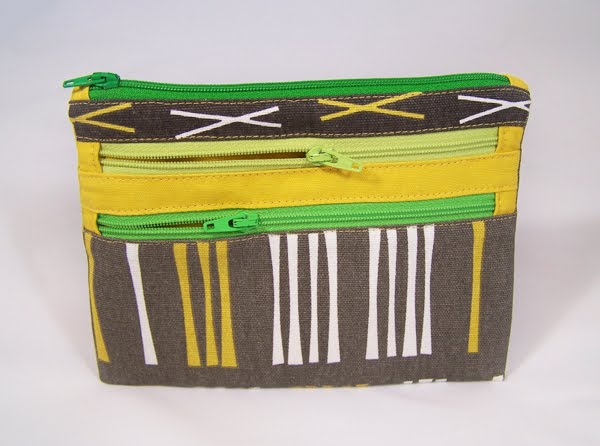
Skiff in Dawn from my Outside Oslo fabric collection and lined the bag with some Artee cotton duck in Turquoise.

The pattern has an oval bottom, so it really is sort of like a bucket—a cute one with a big pocket on the outside and a nicely proportioned strap. Mum added a magnetic snap since a closure is always nice. And I love the button with its coordinating scallops.

My niece Courtney, who creatively modeled the bag after Mum finished it, stated that the fabric looks like trimmed fingernail bits. Excellent. Exactly the look I was going for.

Mum writes:
"It was a pleasure to sew a bag from a pattern that didn't have me tearing my hair out because it was so complicated! I really enjoyed making this bag. The instructions were very detailed, yet clear and easy to follow in a numbered, step-by-step format, with photos to illustrate every step.

I would highly recommend this pattern for anyone just beginning to make bags. It'll get you started in the right direction and you'll learn a lot about the bag-making process. I'd also recommend it for more experienced bag makers, just because it's easy and fun! And no matter your skill level, you'll end up with a very cute bag. I love the shape of it as well as just the overall look.

The next time I use this pattern, I'll probably add a pocket or two inside. Also, I might skip the darts on the outside pocket, because unless something is stuffed into those dart areas, they tend to have a dented/dimpled look (kinda like a bra that's not quite filled out, y'know?). I'd trim the pattern piece so that it remains the same shape, just minus the darts."

Purchase the Bucket Bag pattern right here, and check out other Keyka Lou designs here. All patterns are available for instant download, and most are a mere $5.00 through 11/27/11!
You have read this article bag / design work / pattern review / sewing with the title pattern review. You can bookmark this page URL http://jenkrebs.blogspot.com/2011/11/pattern-review-bucket-bag.html. Thanks!

Butterick tote bag: finished!

Mum just sent over her latest sewing project: a bag made from Butterick's B5475 Totes and Wrist Wallet pattern (on sale now for a mere $2.88). I'd picked out the pattern and mailed it to her, along with my Outside Oslo fabric in the Dusk Picket print. I liked the shape of the bag, the corner details at the bottom, and the rounded ends on the straps.

The bag in action.

What the outside of the pattern envelope didn't show, however, is the peculiar fastening situation inside the bag. Tabs with snap, fine. Additional yellow straps with velcro? Mysterious. They're interfaced and run upwards along the exterior sides of the bag, meeting in the center. The straps are what pull the sides of the bag in to give it that interesting shape, but it seems a bit awkward to either unfasten the velcro every time you want to put something in there, or push the yellow strap aside (which is doable). Have you ever seen a bag with this sort of architecture?

Maybe it doubles as a theft deterrent. A would-be pickpocket might give up in frustration while attempting to fish out my wallet. A buckle, some extra ties I could knot, and then maybe a padlock to hold the whole thing shut might be nice additions, just for more security.

The interior has a divided pocket, one side with a couple darts (or whatever those pleats are called that give it dimension) for holding a cell phone.

The outside pocket has velcro on the flap.

Mum did a fantastic job, as always. She reported that turning those straps inside out almost killed her, but she conquered. Man, does she love me.
You have read this article pattern review / sewing with the title pattern review. You can bookmark this page URL http://jenkrebs.blogspot.com/2011/06/butterick-tote-bag-finished.html. Thanks!

Pattern review: Chickens!

Occasionally my mum, AKA Grandma G, is going to send over her review of a sewing pattern for you sewists who want to make something adorable—and who would like to know a little more about a project before you commit. Today's project: awesome plush chickens, designed by blogger LiEr. The best part is that if you squeeze them, eggs come out. Click here to see the chicken's bottom; this is a G-rated blog and you must be 18 or older to look at this picture. The pattern is available as a PDF download for $12 at the end of LiEr's post. (Also see her cuuute pigs and other patterns for sale in her sidebar.) Grandma G's comments:

"What a fun project this was! As the chickens progressed, I would hold the pieces up, look at them and laugh because they were so cute and funny! The pattern was very well designed with easy-to-follow directions. As the instructions say: 'It is assumed that the sewer has basic to intermediate sewing experience, including knowing how to sew around curves, attach simple gusset-type pieces, sew darts and do top-stitching.' The pattern is not difficult, but I wouldn't choose it as a first project for a beginner sewer. I would also add that you need to know how to embroider just a bit.

There are lots of tiny pieces to cut and sew around. They're not hard to work with, but they do require a little time and patience. I found the hardest part was sewing the wattles into the beaks, and then turning the hen's beak right side out, because it was so small and the felt did not turn easily. I did then make the rooster's beak bigger... after all, roosters are bigger, right? I also changed a couple of things from the original pattern, mainly the placement of the face parts, just to look a bit more realistic, and I made a different tail and bigger comb for the rooster. I would certainly recommend this pattern. The fleece made for a soft, huggable chicken family, and my granddaughter loves them!"
You have read this article pattern review / sewing with the title pattern review. You can bookmark this page URL http://jenkrebs.blogspot.com/2010/05/pattern-review-chickens.html. Thanks!